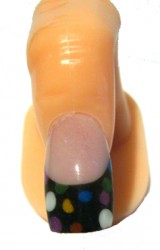
Doing nail art with acrylic is fun and not as difficult as you might think. Using Colour Acrylic Shimmer Powders, we created some polka dot designs.
Polka Dots with a splash of colour
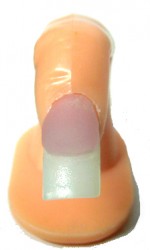
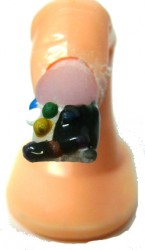
In the first one we used different colours. We started with a cover pink and applied this using the reverse technique. We filed in the smile line.
Next we got tiny beads of colour acrylic and applied these to the tip of the nail. We used a #8 Oval brush to pick these beads up with. Use the point of the brush to pick up the bead.
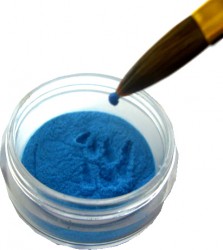
Then we placed the beads onto the nail, making sure that they were slightly higher or the same height as the cover pink application. When you pick up the beads, keep your brush drier than you would normally so that your bead does not spread. If you feel that your bead is not high enough, add a little more on to it.
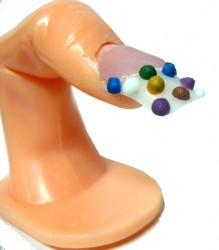
Let your beads dry and then start to apply the colour you want for your french tip. When applying this acrylic you will need to have your mix a little wetter than normal so that the acrylic will flow around all your beads. Don’t worry if you go over your smile line or the beads, all will be revealed later. Cover the entire area and make sure you get your colour right around the smile line.
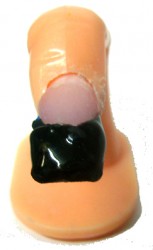
Let this dry and then with a 180 grit file start filing it back. Your beads will soon come to light and so will your smile line if you went over it.
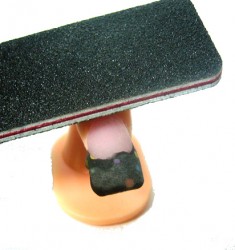
File and shape the nail. Finish with top coat to seal the acrylic.
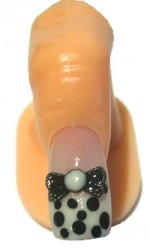
Dots and Bows
Using the same technique as above we did the nails below and added some cute acrylic bows. The white bow has a Swarovski crystal in the centre.