Another quick easy nail art idea that can give amazing effects. We use the water technique, dotting tool technique and the plastic wrap technique, all easy to do.
For this you will need:
1 x light coloured background nail polish, we used white
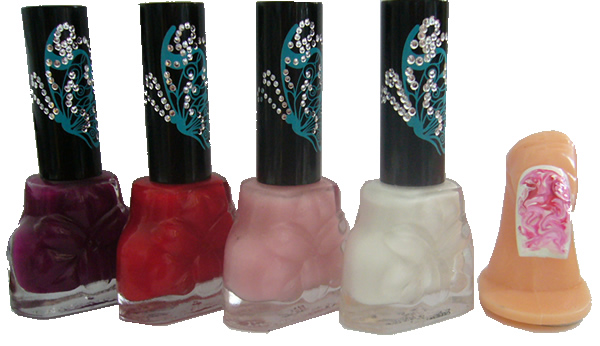
3 different colour polishes, we used red, purple and pink
1 x marbeling or dotting tool
[table caption=”Marbled Nails the easy way” width=”400″ colwidth=”200|200″ colalign=”left|left”]
 ,”Apply a thick base to the nail”
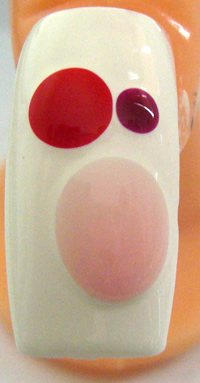 ,”Apply 3 dots onto the white with 3 different colours, we used less of the darker colours so they would not over power the lighter colour.”
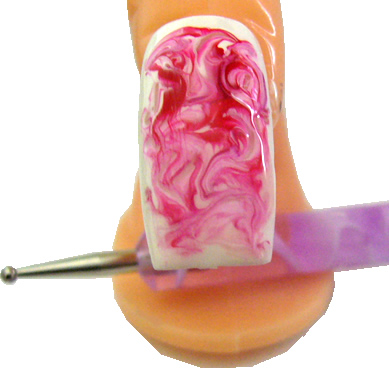 ,”Using the dotting tool swirl the colours together over the nail. Finish with 2 coats of top coat to seal.”
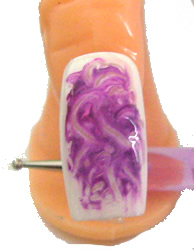 , With this nail we used 2 different purples and a light pink.
[/table]
[table caption=”Another Marbling method using plastic.” width=”400″ colwidth=”200|200″ colalign=”left|left”]
,”Apply a thick base to the nail”
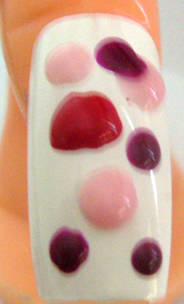 ,”Apply several dots over the nail in different colours”
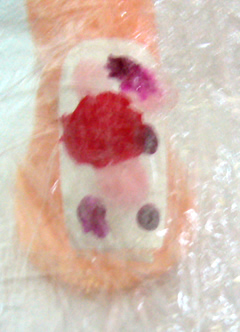 ,”Using plastic (we used folded cling wrap, place the plastic over the nail and push the nail polish around to spread it over the nail. You can add more polish if necessary by repeating this process.”
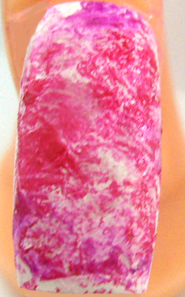 ,”This is what our finished marbling looked like”
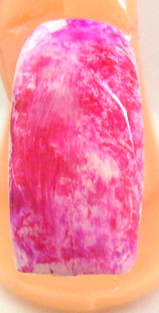 , “We applied 2 coats of top coat and this is the finished nail. To easy.”
[/table]
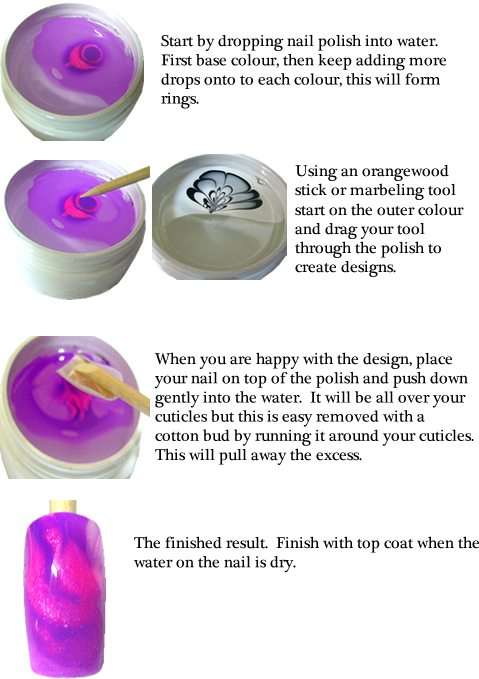
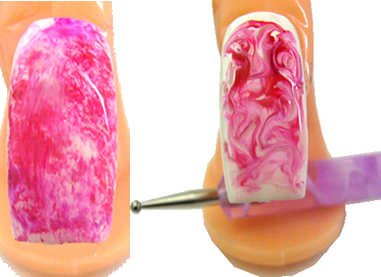
Marbeling with Water
Start by applying a base coat to your nail, this will help the nail polish to adhere. You can also put cellotape around the nail on your finger to reduce the amount of mess.