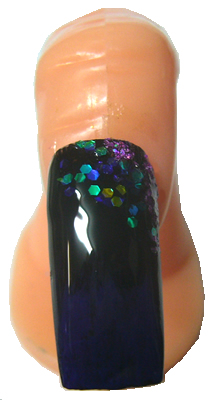
For this design we started with an ombre effect and used the following products:


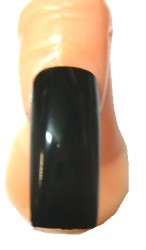
1. Paint your nails in your base colour, we used black. Our Diamond Black Nail Polish only needs one coat for total coverage.
2. While your base coat is drying, get your colours ready for your ombre application (see post on here on how to do Ombre Nails).
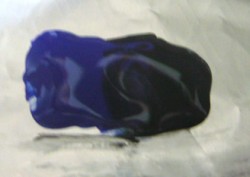
4. Apply your colours to your nails and let this dry completely before going to the next step.
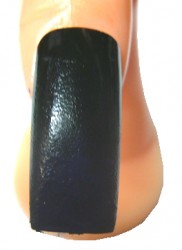
Sometimes it may look as if your light colour is not showing up, if this is the case, don’t be tempted to touch it up or go over it because when you apply the top coat the colour will come out.
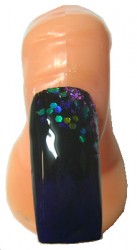
5. Around the cuticle edge of the nail apply a thin coat of top coat and sprinkle over chunky glitter. We used ArtOnNails dotz and Purple Glintz for our glitters. Apply the dotz or chunky glitter first then apply the smaller glitter over that to fill in gaps. Let this dry and using a dusting brush brush away any excess glitter, make sure it is all gone so that when you apply the top coat there are no loose pieces of glitter that will spread to other parts of the nail and look out of place.
6. Apply your top coat and you are done.